Build Your Own QR Code Generator
A QR code (short for quick-response code) is a sort of two dimensional barcode. They were invented in 1994 by the Japanese company Denso Wave to label car parts. Like barcodes they are a machine readable optical image that can contain information.
You’ve probably seen them used to promote websites on marketing material. Like this one:

The Challenge - Building A QR Code Generator
In this challenge we’re going to look at building a QR Code generator from scratch. Obviously this is not something we’d do for a production system, as nearly every programming language has an open source library that will generate them - use that! However as a learning tool they’re quite interesting, we get to parse some input, analyse it, deal with binary data, bit packing, error correction, some algorithms for drawing the image and calculating the penalty patterns and finally rendering an image to screen or file.
Step Zero
Like a C array, we’re zero-indexed and start from 0! For this step your goal is to set your environment up ready to begin developing and testing your solution.
Pick your IDE / editor of choice and programming language of choice.
If you want to get really into writing from a specification QR Codes are defined in ISO/IEC 18004:2015, which you can find on most standards bodies’ websites.
Step 1
In this step your goal is to analyse the data to be encoded to determine how it can be encoded. QR Codes support four text encoding modes: numeric, alphanumeric, byte, and Kanji.
Numeric mode is for the digits 0 through 9. Alphanumeric mode is for the decimal digits 0 through 9, as well as uppercase letters, and the symbols $, %, *, +, -, ., /,:, and space. Byte mode is for characters from the ISO-8859-1 character set.
Kanji mode is for the double-byte characters from the Shift JIS character set.
To determine the mode examine the input data and see which is the simplest mode that can encode it. My approach to this is to use Test Driven Development (TDD). I define a test for each mode and some invalid cases then write a function to determine the mode, stopping when all the tests pass.
However you approach it once you’re happy you can determine the mode correctly proceed to Step 2.
Step 2
In this step your goal is to encode the data as a string of bits. This encoding has 7 steps.
2.1 Select the Error Correction Level
There are four possible levels, higher levels offer more error correction, but resulting in a bigger QR Code.
| Error Correction Level | Error Correction Capability |
|---|---|
| L | Recovers 7% of data |
| M | Recovers 15% of data |
| Q | Recovers 25% of data |
| H | Recovers 30% of data |
Step 2.2 Determine the Smallest QR Code Version
There are 40 QR Code versions, the first 1 is 21x21 pixels, and they increase in size by 4 pixels up to version 40 at 177x177 pixels. To determine the smallest QR Code version you can look it up in the ISO standard (pages 33-36).
For this challenge we can stick to version 4 and use the following data:
| Error Correction Level | Numeric Mode | Alpha Numeric Mode | Byte Mode | Kanji Mode |
|---|---|---|---|---|
| L | 187 | 114 | 78 | 48 |
| M | 149 | 90 | 62 | 38 |
| Q | 111 | 67 | 46 | 28 |
| H | 82 | 50 | 34 | 21 |
2.3 Determine the Mode Indicator
The encoding mode is represented by a 4-bit indicator as follows:
| Mode | Mode Indicator |
|---|---|
| Numeric | 0001 |
| Alphanumeric | 0010 |
| Byte | 0100 |
| Kanji | 1000 |
2.4 Determine the Character Count Indicator
This is a string of bits that represents the number of characters that are encoding in the data. To determine it’s value, count the number of characters in the input data and convert that to binary. Then left pad the string if required to reach the number of bits used to represent the character count for the selected version and mode.
For version 1 through 9 the number of bits are:
| Mode | Number of Bits |
|---|---|
| Numeric | 10 |
| Alphanumeric | 9 |
| Byte | 8 |
| Kanji | 8 |
2.5 Encode the Data Using the Selected Mode
Using the previously determined values build the bit string that represents the mode, length and data. For the data HELLO CC WORLD that would be:
Mode: 0010
Character Count: 000001110
Data: 01100001011011110001101000101110001000101000110011101001000101001101110111110
2.6 Pad as Required
Once the preceding step has been completed, you need to determine the full bit string to use. This is the combination of the mode, character count and data bit strings. The specification requires that the bit string fills the full capacity of the QR code so you will need to pad the bit string if it does not.
To find the capacity you need to refer to Table 9 on page 38 of the ISO specification. For version 4 it is:
| Error Correction Level | Total Number of Data Codewords for this Version and EC Level |
|---|---|
| L | 80 |
| M | 64 |
| Q | 48 |
| H | 36 |
Multiply the number of codewords by 8 to get the number of bits. If your bit string is shorter add the bit string 0000 as a terminator. If there isn’t enough room shorten the terminator to fit.
After adding the terminator, further padding zeros should be added if the bit string does not end with a complete byte. After that if the data is still shorter than the QR Code data capacity it should be padded with the alternating patter of bytes 0xEC and 0x11.
Step 3
In this step your goal is to implement the error correction. This is based on Reed–Solomon error correction and is covered in the ISO specification.
To fully implement error correction you need to break the message up into group 1 and 2 as well as blocks within the group. For version 4 there is no group 2 and the number of blocks is as follows:
| Error Correction Level | Number of Error Correction Blocks | Error Correction Codewords per Block | Data Codewords per Block |
|---|---|---|---|
| L | 1 | 20 | 80 |
| M | 2 | 18 | 32 |
| Q | 2 | 26 | 29 |
| H | 4 | 16 | 9 |
Thus at error correction level L the whole message would be in one block, for M the message would be split into two blocks of 32 data codewords.
Then it’s simply 😇 a matter of calculating the error correction codewords for each block and structuring the message with them. The detail for this step is too much for me to fit in, it’s described in 7.5.2 and 7.6 of the specification - from page 44.
There’s also an excellent tutorial here.
Step 4
In this step your goal is to start building the QR Code image. There are several steps, defined in the specification in section 7.7 (page 46) onwards. Essentially the steps are:
- Create an array of the right size i.e. for version 1 it would be 21x21.
- Place the finder patterns in the top left, top right and bottom left.
- Add the separators around them.
- Add the alignment pattern.
- Add the timing pattern.
- Add the dark module.
- Reserve the format information and version information areas.
- Place the data bits, skipping the areas affected by steps 1-7 of this list.
Again there’s an excellent tutorial here.
Step 5
In this step your goal is to determine which data mask should be applied. The data mask changes which entries in the array are dark and which are light. The purpose of this is to modify the QR code to make it as easy for a QR code reader to scan as possible.
Applying the data mask is described in the specification Section 7.8 on page 50. You can also study this tutorial.
Step 6
In this step your goal is to create the format and version information encoding and place them in the correct location. This is detailed in section 7.9 and 7.10 of the specification. It’s also explained in this tutorial.
Step 7
In this step your goal is to render the QR Code, adding the quiet zone (section 9.1 of the specification) as an image and save it to file.
Essentially for this step you want add a quiet zone of 4 array elements all around the data array, these would all be set to zero. When you render the QR code, elements in the array that are set to 1 will be rendered as black squares and zeros as white squares.
How large you make each square when you render it will depend on your target image size.
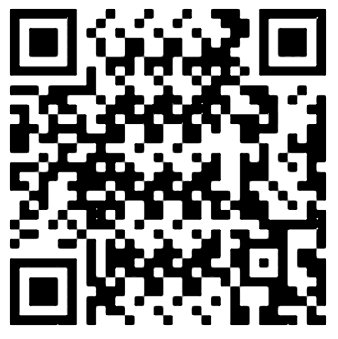
As a final test, see if you can reproduce this QR code:
Help Others by Sharing Your Solutions!
If you think your solution is an example other developers can learn from please share it, put it on GitHub, GitLab or elsewhere. Then let me know - ping me a message on the Discord Server, via Twitter or LinkedIn or just post about it there and tag me. Alternately please add a link to it in the Coding Challenges Shared Solutions Github repo.
Get The Challenges By Email
If you would like to receive the coding challenges by email, you can subscribe to the weekly newsletter on SubStack here: