Build Your Own URL Shortener
This challenge is to build your own URL shortening service. Think bit.ly or tinyurl.com.
Basically it’s a service that lets a client submit a long URL which is then shortened to make it easier to use. For example:
could become: https://tinyurl.com/bdds8utd
This is typically done with a web based user interface, that let’s users enter a long URL and get back a shortened version of the URL. For example:
The shortening service then keeps a record of the short code, i.e. bdds8utd in the example above and the long URL that it maps to. Then when a client requests the shortened URL the service returns a HTTP redirect code, sending them to the long URL.
The Challenge - Building a URL Shortening Service
For this challenge, if you are backend focused (like me) you could just build the REST API to create a shortened URL and redirect a request for the shortened URL to the long URL. If you’re feeling more adventurous you could build the frontend too, creating a form for users to submit a URL and get back a shortened URL.
The ultimate however would be to build both, along with some automated testing and then create a CI/CD pipeline to deploy the whole thing as a service to one of the cloud providers.
If you fancy doing that don’t forget AWS offer a free tier, Azure offers a similar set of services that are free (with limits) for 12 months and Google Cloud offers 20+ free products for all customers (with limits) and $300 in free credits (at the time of writing).
Step Zero
In this step you decide which programming language and IDE you’re going to use and you get yourself setup with a nice new ‘urlshortener’ project. I built my backend in Rust and frontend in TypeScript using Next and React.
Step 1
In this step your goal is to create a REST API that will allow a client to add a URL to the list of URLs that are currently shortened.
You will need to consider where you are going to store the shortened URLs and the full URL they expand to. I’d suggest using some form of database for persistence. Either SQL or NoSQL will work for this. I used an in memory store for my version, but if I was going to deploy it, I’d probably use Redis. Why? Because I could use the version we built in the build your own Redis Server challenge for testing locally and when you come to deploying, Redis is also available on most cloud platforms.
You will also need to decide how you’re going to generate a short key for each URL. I’d suggest you read up about hash functions. Think carefully about how short you make it and the danger of shorter hashes colliding.
You should return a suitable HTTP status code when the request succeeds, along with the shortened URL, I decided to return it as JSON using the structure:
{
    "key":"wsf5f",
    "long_url":"https://www.google.com",
    "short_url":"http://localhost/wsf5f"
}
For example, calling the API with curl you should get something like this:
% curl -X POST http://localhost:8080/ \
-H "Content-Type: application/json" \
-d '{"url": "https://www.example.com"}'
{"key":"Y3S9wb",
"long_url":"https://www.example.com",
"short_url":"http://localhost/Y3S9wb"}
N.B. I’ve wrapped the JSON response above at each comma to make it fit all screens.
When the URL already exists you can return the same status code and existing shortened version of the URL. In other words the API call to create a shortened URL should be idempotent.
Idempotent APIs: If you send multiple identical requests, only the first request would cause a change, all subsequent requests will not change the state of the system. Therefore, the results returned to the client will not depend on how many times the method has been called. It is safe to call an idempotent API multiple times with the same input.
If the request is invalid you should return a suitable HTTP status code and ideally a clear error message to help any user of the API fix their request / understand the error in their logs.
% curl -X POST http://localhost/ \
-H "Content-Type: application/json" \
-d '{"wrong key": "https://www.example.com"}' -i
HTTP/1.1 400 Bad Request

Missing field: url
N.B. I’ve cut out a couple of the returned headers in the example above to make it easier to read.
Bonus Points: Add a check to ensure that a duplicate key that is generated from a different long URL is handled. One option might be to add a unique value to the hash input and re-hash.
Step 2
In this step your goal is to redirect a client request for the shortened URL. To do that you will need to return the relevant HTTP status code (I’d suggest 302 Found) and the Location header.
Testing it should look something like this:
% curl http://localhost/jlrtPU -i
HTTP/1.1 302 Found
content-length: 0
location: https://www.example.com
If you add the -L flag to the curl command you can see if the header is valid and curl follows it - which, if it does, will dump the HTML of the target URL in your console. I’ll spare you pages of that!
Whereas a invalid short URL might look like this:
% curl http://localhost/rtfdPU -i
HTTP/1.1 404 Not Found
content-length: 15
URL not found
Step 3
In this step your goal is to extend your REST API to accept a Delete request, which should delete the shortened URL if it exists and take no action if it does not.
% curl -X DELETE http://localhost/DmrFqF -i
HTTP/1.1 200 OK
content-length: 0

% curl http://localhost/DmrFqF -i
HTTP/1.1 404 Not Found
content-length: 15
URL not found
After the key and URL have been deleted they should no longer exist in the persistent storage/database that you’ve used.
Step 4 (Optional) GUI
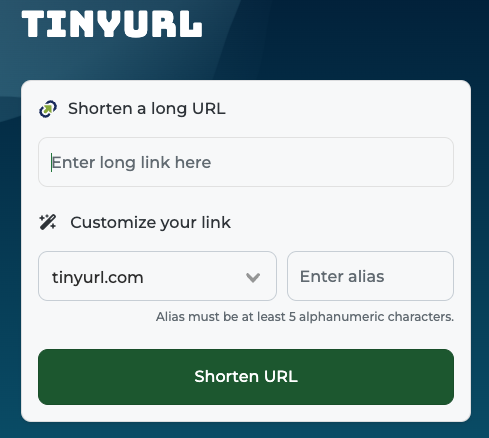
In this step your goal is to build a GUI to enable a user to create the shortened URLs via a simple web form without the need for curl.
Here’s a very simple input screen you could build:

Then when the URL is submitted make a call to you REST API and update the UI with the result:

Ideally though, your UI/UX skills are better than mine and you build a much nicer looking UI! Bonus points for a nice button to click to copy the shortened URL!
Step 4 (Optional) CI/CD
In this step your goal is to create an automated integration and deployment pipeline so that every change to the codebase is automatically built, tested and deployed.
My favourite tool for a small project is GitHub Actions, but all the cloud providers offer tools too. Your goal should me to create an automated process that ensure all commits to master are built, tested and if the tests pass, deployed to your chosen production environment.
Going Further
Taking this further, you could add some form of user authentication and signup then integrate a payment solution like Stripe and you’ve built not just a real-world application, but a viable business!
Help Others by Sharing Your Solutions!
If you think your solution is an example other developers can learn from please share it, put it on GitHub, GitLab or elsewhere. Then let me know - ping me a message on the Discord Server, via Twitter or LinkedIn or just post about it there and tag me. Alternately please add a link to it in the Coding Challenges Shared Solutions Github repo.
Get The Challenges By Email
If you would like to receive the coding challenges by email, you can subscribe to the weekly newsletter on SubStack here: